Creating a deep raised bed can be a fantastic solution for gardeners looking to maximize their growing space, particularly when soil quality is poor or limited. Raised beds improve drainage, offer easy access for planting and maintenance, and can yield better results with less effort. However, the cost and labor involved in filling them can be daunting, especially when trying to avoid high-priced soil and compost. Fortunately, there are cost-effective methods that can help you fill your deep raised bed without breaking the bank. This guide provides a comprehensive, step-by-step method for filling your bed affordably using a layering technique.
Understanding the Benefits of Deep Raised Beds
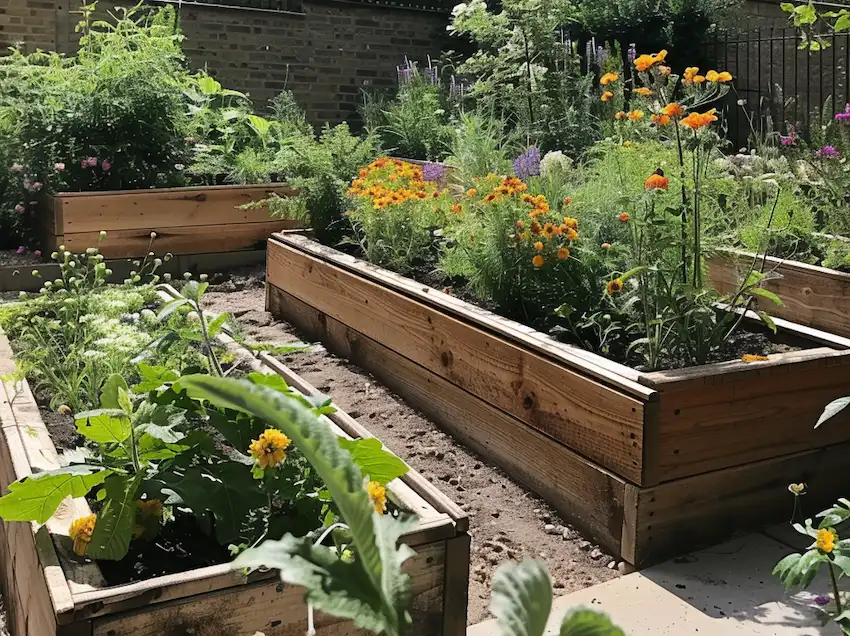
Deep raised beds—typically ranging from 12 inches to 36 inches in height—offer numerous advantages. They provide ample space for plant roots to grow deep, which is essential for certain vegetables like tomatoes, carrots, and potatoes. The increased depth also promotes excellent drainage, which helps prevent waterlogging that could damage plant roots. Additionally, deep raised beds help protect your plants from compacted or poor-quality native soil, making them especially beneficial in areas with clay or rocky soil.
Aside from improving soil conditions, raised beds also make gardening easier by reducing bending and kneeling, which is a huge plus for gardeners with limited mobility. Moreover, these beds warm up more quickly in the spring, extending your growing season. Despite these benefits, the cost of filling a deep raised bed with high-quality soil can add up quickly. However, by using an effective layering technique, you can create a healthy, fertile bed for your plants at a fraction of the cost.
Step 1: Planning Your Raised Bed
Before you begin layering, it’s important to plan the layout and design of your raised bed. Consider the following:
- Dimensions: Choose the size and depth of your bed. A depth of at least 24 inches is ideal for most deep-rooted vegetables. Wider beds (about 4 feet) will give you enough space to access the plants from both sides without stepping into the soil.
- Location: Make sure your raised bed is in a spot that gets at least six hours of sunlight daily. Sunlight is crucial for vegetable growth, so choose a location that meets this requirement.
- Materials: Select materials for the sides of your raised bed. Untreated wood (such as cedar or redwood), bricks, cinder blocks, or even repurposed materials can work well. Avoid using pressure-treated wood, which may contain harmful chemicals that can leach into the soil.
Step 2: Layering for Cost Efficiency and Soil Health
The most economical and effective way to fill a deep raised bed is through the “lasagna gardening” or “sheet mulching” technique. This method involves layering various materials that will break down over time to improve the soil. The decomposition of these layers creates rich, fertile soil for your plants.
Bottom Layer (Drainage)
- Materials: Rocks, gravel, broken pottery, or other similar materials.
- Purpose: This layer serves to create proper drainage at the bottom of the bed. It prevents water from pooling and ensures that your plants’ roots do not become waterlogged. Proper drainage is essential for the health of most plants, as stagnant water can cause root rot.
The bottom layer doesn’t need to be thick—around 2-4 inches will suffice. Larger stones are preferable because they create more air space and better drainage, while smaller gravel can fill in the gaps.
Middle Layers (Bulk Material)
- Materials: Logs, branches, leaves, grass clippings, wood chips, straw, hay, or any other organic matter you can source locally. These materials can often be found for free or at a low cost, making them an excellent budget-friendly option.
- Method: Start with larger, bulkier materials like logs, branches, and small tree trimmings. These materials take longer to decompose, but they provide the bulk needed to fill up the bed without relying on expensive soil or compost. On top of the larger items, add smaller materials like grass clippings, hay, straw, and leaves. These will break down more quickly and help fill in the gaps.
These middle layers create a rich, organic compost as they decompose, providing valuable nutrients to the soil. It’s important to layer these materials evenly and compact them as you go to minimize air pockets.
Compost Layer
- Materials: A thick layer of compost will add nutrients and beneficial microorganisms to the soil. If you don’t have compost, you can buy it cheaply or make your own from kitchen scraps, yard waste, and garden clippings.
- Tip: If you’re composting at home, make sure you regularly turn your pile to aerate it and speed up the decomposition process.
Adding compost at this stage is crucial because it not only enriches the soil but also enhances its structure and fertility, which will help your plants thrive.
Step 3: Top Layer (Growing Medium)
- Materials: A mixture of good-quality topsoil and compost. This will be the final layer where your plants will actually grow.
- Depth: Ensure this layer is at least 6-8 inches deep. This will give your plants the immediate growing space they need and allow their roots to develop properly.
The top layer should be light and well-draining, but also nutrient-rich to support healthy plant growth. If you have a limited budget, you can source soil from local suppliers or even a nearby community garden if they offer it. Mixing your own compost with topsoil can significantly reduce costs.
Step 4: Planting
Now that your bed is filled, you’re ready to plant. Choose plants that are suitable for a deep raised bed and that can benefit from the extra space and soil depth. Some excellent options include:
- Deep-rooted vegetables: Tomatoes, carrots, potatoes, beets, and parsnips.
- Leafy greens: Lettuce, kale, spinach, and Swiss chard.
- Herbs: Basil, rosemary, and parsley.
Be sure to plant according to each plant’s spacing and depth requirements. If planting seeds, follow the instructions on the seed packet for the best results.
Step 5: Maintenance
Once planted, your deep raised bed will require regular maintenance, but the effort is well worth the rewards.
- Watering: Deep raised beds tend to dry out faster than in-ground beds, especially in hot weather. Water deeply and consistently, especially during dry spells. To conserve moisture, water at the base of the plants to avoid wetting the foliage, which can lead to fungal diseases.
- Mulching: Apply a 2-3 inch layer of mulch around your plants. This helps retain moisture, suppress weeds, and regulate soil temperature, preventing it from getting too hot in the summer or freezing in the winter.
- Fertilizing: If your plants start to show signs of nutrient deficiencies, such as yellowing leaves, consider adding a slow-release fertilizer or more compost to boost soil fertility.
Cost-Saving Tips
- Source materials locally: Look for free or inexpensive organic materials like tree trimmings, leaves, or grass clippings. These can often be found in your neighborhood or local parks.
- Community resources: Some communities offer free mulch or compost to residents. Check with your local recycling center or garden center for availability.
- DIY compost: Composting kitchen scraps and garden waste is an excellent way to create nutrient-rich soil for your raised bed. It also helps reduce waste and recycle organic matter.
By following these steps, you can fill your deep raised bed affordably, making it an eco-friendly and sustainable solution for gardening. Not only will you save money, but you will also contribute to a healthier environment by repurposing organic materials and reducing waste. Enjoy the process of creating a fertile and productive garden bed that will serve you for years to come!