Clematis vines are prized for their dramatic, colorful blooms and ability to transform garden spaces. They grow beautifully on trellises, enhancing walls, fences, and other vertical structures. With the right care and attention, clematis can provide a breathtaking display that lasts for months. Here’s how to grow and care for clematis on a trellis effectively.
Step 1: Choose the Right Clematis
- Flowering Time:
Clematis varieties are grouped into three categories based on their blooming cycles:- Group 1: Early spring bloomers.
- Group 2: Late spring to early summer bloomers with occasional second blooms.
- Group 3: Late summer to early fall bloomers.
Choose based on your desired flowering season or mix varieties for continuous blooms.
- Climate Compatibility:
- Some varieties thrive in colder climates, while others are better suited to warmer regions.
- Check the plant label or consult local gardening experts for recommendations.
- Size Consideration:
- Compact clematis (6–10 feet): Ideal for small trellises or containers.
- Large clematis (12–20 feet): Perfect for covering fences, walls, or large garden structures.
Step 2: Select the Perfect Location
- Sunlight Needs:
- Most clematis varieties require at least six hours of direct sunlight daily.
- Varieties like Clematis montana or Clematis alpina tolerate partial shade.
- Protection from Wind:
- Place the trellis in a spot shielded from strong winds to prevent damage to the delicate vines and flowers.
- Soil Quality:
- Clematis thrives in rich, well-draining soil. Amend the planting site with compost or organic matter to improve fertility.
Step 3: Install a Suitable Trellis
- Sturdy Construction:
Clematis vines can become heavy as they mature. Use a durable trellis made from materials like metal, wood, or reinforced plastic. - Design Options:
- Freestanding trellises work well in open spaces.
- Wall- or fence-mounted trellises offer stability and save space.
- Height and Width:
Ensure the trellis is tall enough to accommodate the mature height of your clematis and wide enough to allow lateral growth.
Step 4: Planting Your Clematis
- Prepare the Planting Hole:
- Dig a hole twice as wide and as deep as the clematis’s container.
- Add compost to enrich the soil.
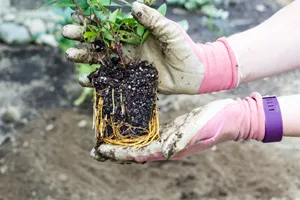
- Position the Plant:
- Place the root ball in the hole with the crown (where the stems meet the roots) 2–3 inches below soil level.
- This helps protect the plant from disease and encourages basal shoots for fuller growth.
- Fill and Water:
- Backfill with soil, gently firming it down to eliminate air pockets.
- Water thoroughly to settle the soil around the roots.
Step 5: Train and Prune Your Clematis
- Training on the Trellis:
- Use soft ties or garden twine to secure the young stems to the trellis.
- Space the stems evenly for a balanced appearance as they grow.
- Pruning Guidelines:
Pruning depends on the clematis’s group:- Group 1: Prune lightly after flowering to shape the plant.
- Group 2: Trim dead or weak stems in late winter; light pruning after the first bloom.
- Group 3: Cut back to 12–18 inches above ground level in late winter or early spring.
- Ongoing Adjustments:
Regularly check ties to ensure they’re not cutting into the stems. Reposition as needed to guide new growth.
Step 6: Care and Maintenance
- Watering:
- Keep the soil evenly moist but avoid overwatering.
- Deep waterings during dry spells are essential to keep the roots hydrated.
- Fertilizing:
- Apply a balanced fertilizer (e.g., 10-10-10) in early spring when new growth begins.
- Feed again midseason for repeat bloomers.
- Mulching:
- Add a layer of mulch around the base to retain moisture and regulate soil temperature.
- Avoid piling mulch against the stems to prevent rot.
Bonus Tips for Success
- Cool Roots, Warm Tops:
Clematis thrives when its roots are cool and shaded, but its vines receive sunlight. Use ground-cover plants, stones, or mulch to keep the root zone cool. - Companion Planting:
Plant low-growing perennials like lavender or ornamental grasses near the base of the trellis to shade the roots and complement the clematis flowers. - Inspect for Pests and Diseases:
- Watch for aphids, slugs, and spider mites. Treat infestations promptly with organic insecticides or natural predators.
- Prevent clematis wilt by ensuring good air circulation and pruning infected stems immediately.
Transform Your Garden with Clematis
With their vibrant, showy flowers and climbing elegance, clematis plants can elevate the aesthetic of any garden. By following this detailed guide, you’ll not only ensure healthy growth and abundant blooms but also create a striking vertical display that’s sure to draw admiration. Whether framing an entryway, enhancing a fence, or creating a private retreat, clematis vines are a rewarding addition to your gardening repertoire.