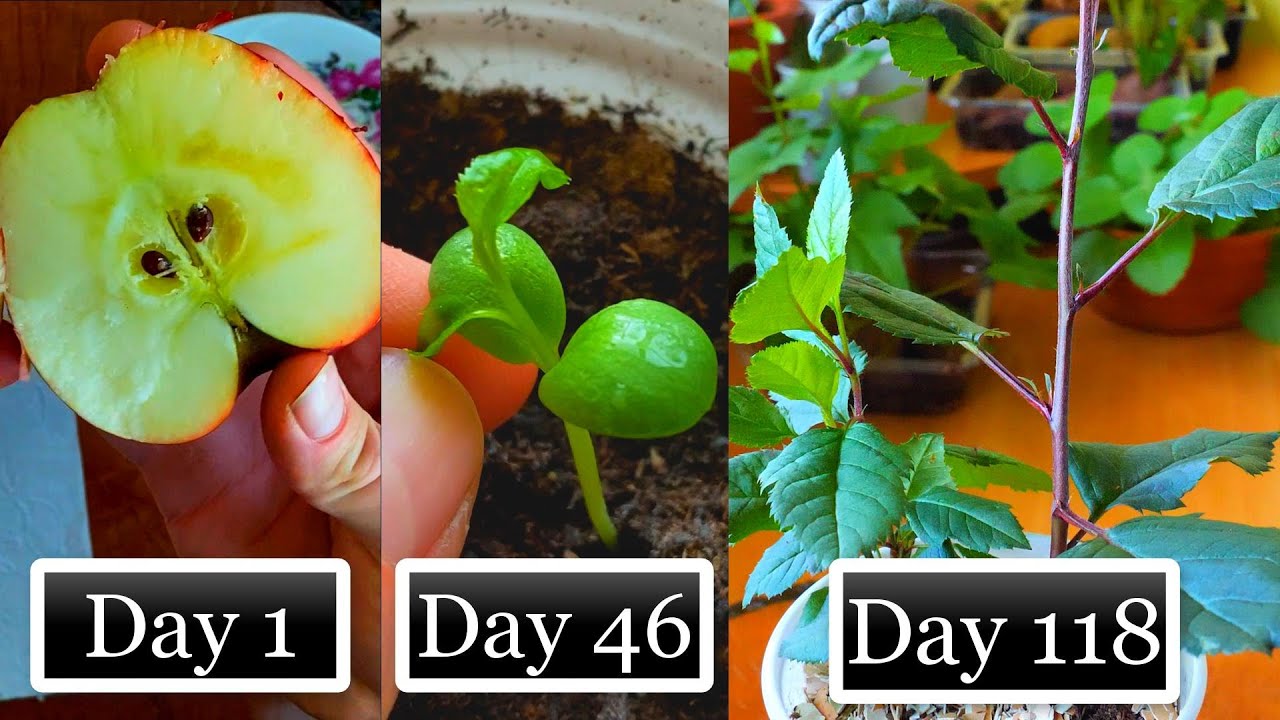
Imagine turning something as simple as a discarded apple core into a living, thriving sapling. With a touch of patience and a few basic steps, you can grow your own apple tree from the seeds hidden inside a single apple. This eco-friendly practice not only reduces waste but also connects you to the magic of nature as you witness life sprout from scraps. Let’s explore how you can embark on this journey, creating a sapling that could one day grow into a flourishing tree.
Why Grow Apple Saplings from Scraps?
Apples are a staple of healthy diets worldwide, packed with vitamins and fiber. But their value extends far beyond their nutritional benefits. Within the apple’s core lie seeds that hold the potential to grow into a new tree. While apple trees grown from seeds may not produce fruit identical to the parent apple (due to genetic variation), they serve as an excellent starting point for cultivating a tree that can later be grafted for fruit-bearing potential.
This project is not just about the result—it’s about the process. Growing a sapling from a seed offers:
- A sustainable way to reduce waste by reusing apple cores.
- Educational opportunities for children to learn about plant life.
- Therapeutic benefits for adults, providing a calming and rewarding activity.
Step 1: Harvesting the Seeds
The journey begins with selecting seeds from a fresh, ripe apple. Here’s how to do it:
- Choose the Right Apple:
- Opt for a mature apple that is firm and unblemished. A healthy apple increases the likelihood of viable seeds.
- Extract the Seeds Carefully:
- Slice the apple open gently, stopping just before you reach the core to avoid damaging the seeds.
- Use your fingers or a small spoon to remove the seeds from the core.
- Clean the Seeds:
- Rinse the seeds thoroughly under running water to remove any fruit residue.
- Pat them dry with a clean paper towel. Residual flesh can cause mold during germination, so ensure the seeds are clean.
Step 2: Germinating the Seeds
Seed germination is where the magic begins. With just a few materials, you can create the perfect environment for your seeds to sprout.
- Prepare a Container:
- Use a clean plastic or glass container with an airtight lid. This will create a mini greenhouse.
- Line with a Damp Napkin:
- Place a clean white cloth napkin or paper towel in the container. Lay the seeds on top, spaced apart, and fold the napkin over them.
- Mist the napkin lightly with water until it’s damp but not soaking wet.
- Seal and Store:
- Close the container and place it in a warm, well-lit spot. Avoid direct sunlight, which can overheat the container.
- Monitor the Seeds:
- Check the seeds every few days to ensure the napkin stays damp. You should see small roots emerging after 10 days.
Step 3: Planting the Germinated Seeds
Once your seeds have sprouted, it’s time to transfer them to soil.
- Choose the Right Pot:
- Start with a small pot about 10 cm in diameter. Ensure it has good drainage holes.
- Fill the pot with peat soil or soft, well-draining universal soil.
- Plant the Seed:
- Create a hole about 3-4 cm deep in the soil.
- Using tweezers, carefully place the germinated seed into the hole, ensuring the root points downward. Cover gently with soil.
- Water Gently:
- Mist the soil lightly with water to keep it moist but not soggy.
- Position the Pot:
- Place the pot in a location that receives indirect sunlight. Too much direct light can stress the young sprout.
Step 4: Caring for Your Sapling
The first few weeks are critical for the sapling’s development. Follow these care tips to ensure healthy growth:
- Watering:
- Check the soil regularly to ensure it remains slightly moist. Use a spray bottle to avoid overwatering.
- Lighting:
- Keep the pot in a spot with ample natural light, such as a windowsill.
- Monitor Growth:
- In about 7 days, the sprout should reach a height of 4 cm. Over the next month, small leaves will begin to emerge.
- Repotting:
- As the sapling grows, move it to larger pots to provide ample space for the roots to expand.
Step 5: Preparing for Long-Term Growth
Once your sapling reaches a height of 1 meter and its trunk measures about 1 cm in diameter, it’s ready for grafting. This step is crucial for producing fruit that matches the parent apple variety.
Benefits of Growing Apple Saplings
- Eco-Friendly: Reduces waste by repurposing apple cores that would otherwise be discarded.
- Cost-Free: Requires minimal materials, most of which are readily available at home.
- Educational: Teaches children and adults alike about plant life cycles and the importance of sustainability.
- Therapeutic: Offers a calming and rewarding activity that fosters a connection with nature.
- Future Potential: While fruiting may take years, your sapling could eventually grow into a beautiful tree, enriching your garden and providing shade.
Final Thoughts
Growing an apple sapling from scraps is more than just a gardening project—it’s a symbol of sustainability, patience, and the joy of nurturing life. With minimal effort and resources, you can witness the miracle of growth, turning what would be waste into a living plant.
Whether you’re an experienced gardener or a beginner, this simple process invites you to embrace the beauty of nature and the rewards of your efforts. Start your apple-growing journey today, and enjoy the satisfaction of creating something extraordinary from the ordinary.