Growing mushrooms at home is not only an enjoyable hobby but also a sustainable way to ensure a steady supply of fresh produce. Among the most accessible methods is using plastic bags, which serve as a compact, efficient, and scalable growing system. With proper care, this technique allows for continuous harvesting, ensuring fresh mushrooms on your plate every day. Below, you’ll find a comprehensive guide to mastering this cultivation process.
Step 1: Prepare the Lime Water Mixture
Lime water is used to treat the substrate (growing medium) and create an environment that favors mushroom growth while minimizing contaminants.
- Ingredients and Materials Needed:
- 200 grams of lime powder
- 30 liters of clean water
- A large, clean container for mixing
- Instructions:
- In a large container, mix the lime powder thoroughly with 30 liters of water.
- Stir until the lime powder is fully dissolved. This solution will balance the substrate’s pH and inhibit harmful microorganisms.
Step 2: Prepare the Substrate
The substrate acts as the base where mushrooms grow. Common choices include straw, hay, or other organic materials that retain moisture well.
- Materials Needed:
- Straw or hay
- Lime water mixture prepared earlier
- A draining setup, such as a mesh basket or colander
- Steps to Prepare the Substrate:
- Submerge the straw or hay in the lime water mixture, ensuring it is fully soaked.
- Allow the material to soak for about 30 minutes.
- Remove the substrate and drain it thoroughly to remove excess water.
- Key Tip: Proper drainage is crucial. The substrate should be moist but not dripping wet, as excess water can lead to contamination or poor mushroom growth.
Step 3: Incubate the Substrate
Incubation helps pasteurize the substrate, eliminating harmful microbes and preparing it for mushroom spawn.
- Process:
- Spread the drained substrate into a pile or layer it in a covered container.
- Cover the pile with plastic sheeting to retain heat and moisture.
- Allow the substrate to incubate for about 4 days, maintaining a temperature of 65–70°C (149–158°F). This can be monitored using a thermometer.
Step 4: Set Up Plastic Bags for Mushroom Growth
Plastic bags are used to hold the prepared substrate and provide an environment conducive to mushroom growth.
- Choosing the Right Plastic Bags:
- Use polyethylene (PE) bags, ideally measuring 30 x 40 cm.
- Bags with a folded square bottom are preferred, as they make layering easier.
- Filling the Bags:
- Start with a 3–4 cm layer of the prepared substrate at the bottom of the bag.
- Sprinkle mushroom spawn (seeds) evenly along the walls of the bag.
- Continue adding alternating layers of substrate (6–7 cm thick) and spawn until the bag contains four layers.
- Finish with a final layer of spawn on the topmost substrate layer.
- Sealing the Bags:
- Insert clean cotton plugs into the bag openings.
- Secure the plugs with rubber bands or ties.
Step 5: Transfer to the Nursery
The nursery is where the mycelium (the vegetative part of mushrooms) grows, preparing the bag for fruiting.
- Setting Up the Nursery:
- Arrange the bags in a well-ventilated room with minimal light exposure.
- Maintain high humidity levels (80–90%) and a temperature range of 20–28°C (68–82°F).
- Cover the mouths of the bags with newspapers to preserve moisture.
- Duration: Allow the bags to remain undisturbed for 2–4 weeks, or until the substrate is fully colonized by white mycelium.
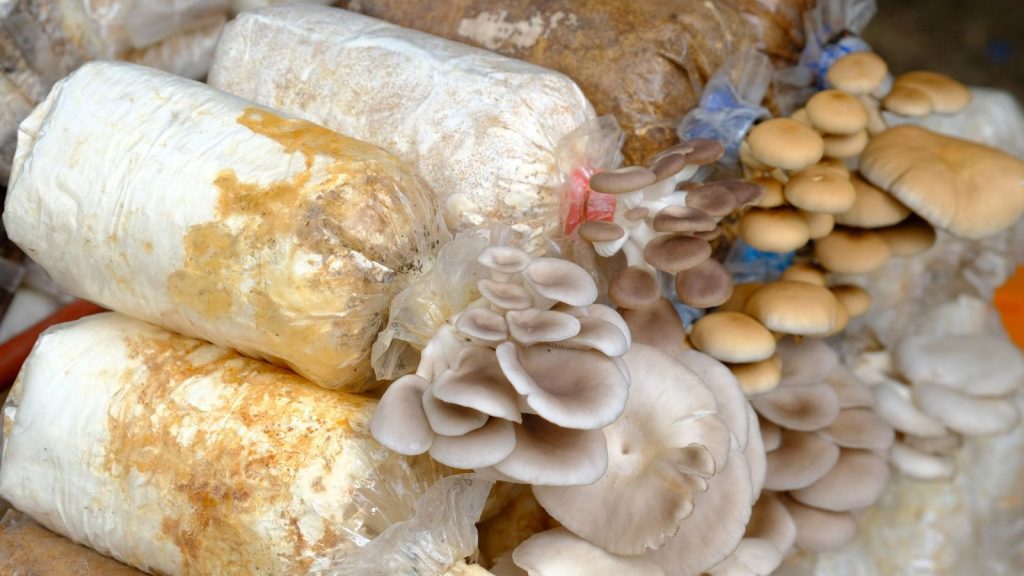
Step 6: Transition to Fruiting Phase
Once the bags are fully colonized, it’s time to prepare them for mushroom production.
- Bag Preparation:
- Gently cut the sides of the bags to allow mushroom pins (tiny sprouts) to emerge.
- Hang or arrange the bags in a staggered manner to ensure proper air circulation.
- Environmental Adjustments:
- Increase light levels slightly to simulate natural conditions.
- Maintain high humidity by misting the area regularly.
Step 7: Watering and Harvesting Mushrooms
Proper watering and harvesting practices are crucial for maintaining a steady production cycle.
- Watering:
- Spray the bags with clean water 2–3 times daily to keep the substrate moist.
- Avoid soaking, as excessive water can cause fungal contamination or poor yields.
- Harvesting Mushrooms:
- When mushrooms are mature, gently twist them counterclockwise to detach them from the substrate.
- Remove any remaining stems to prevent decay.
- Post-Harvest Care:
- Pause watering for 1–2 days to allow the substrate to rest.
- Repeat the watering schedule to stimulate the next flush of mushrooms.
Step 8: Managing Multiple Flushes for Daily Harvests
Mushrooms typically grow in cycles, known as flushes. With proper care, you can enjoy multiple flushes from the same substrate.
- Subsequent Flushes:
- After the first harvest, new mushrooms will emerge within 7–10 days.
- Each flush may yield more mushrooms as the substrate becomes fully utilized.
- Maximum Productivity:
- Continue watering and harvesting until the substrate is depleted, which usually occurs after 3–5 flushes.
- Replace the substrate and repeat the process for continuous cultivation.
Why Grow Mushrooms in Plastic Bags?
- Space-Saving: Ideal for small spaces, allowing for vertical stacking or hanging arrangements.
- Cost-Effective: Requires minimal investment in materials while yielding significant returns.
- Customizable: Adaptable to different mushroom varieties, including oyster, shiitake, and lion’s mane.
- Eco-Friendly: Uses organic waste materials like straw or hay as the growing medium.
Tips for Success
- Maintain Cleanliness: Sterilize all tools and surfaces to minimize the risk of contamination.
- Monitor Conditions: Regularly check humidity and temperature to ensure optimal growing conditions.
- Experiment: Try different substrates or mushroom varieties to find what works best for you.
By following this step-by-step guide and dedicating consistent effort, you can cultivate a thriving mushroom farm right in your home. With patience and attention to detail, this rewarding process will provide fresh, delicious mushrooms every day.