Growing potatoes can be a rewarding and fun gardening experience, and using sacks to grow them offers an innovative solution for small spaces. This method not only saves room but also increases your potato yield significantly. Here’s a simple step-by-step guide that includes a surprising trick that will make your harvest even better.
Benefits of Growing Potatoes in Sacks
- Space Efficiency: Perfect for small gardens or even balconies.
- Ease of Harvest: No digging required—just tip the sack to harvest.
- Pest Management: Reduces the risk of soil-borne pests.
- Soil Control: Allows you to create and maintain ideal soil conditions.
Materials Needed
- Large, Sturdy Sacks: Burlap or a similar breathable material works best.
- High-Quality Potting Soil
- Seed Potatoes
- Compost or Well-Rotted Manure
- Watering Can or Hose
- Fertilizer (Optional)
Step-by-Step Guide to Growing Potatoes in Sacks
Step 1: Choose the Right Seed Potatoes
Select certified seed potatoes that are productive and disease-resistant. Let them sprout in a light, cool place before planting.
Step 2: Prepare Your Sacks
Roll down the sides of the sacks to about half their height, making it easier to add soil and plant your potatoes. Punch a few holes in the bottom for drainage.
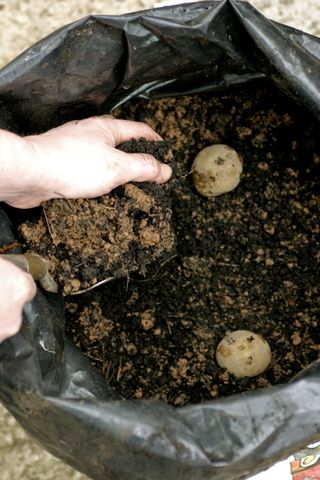
Step 3: Layer Soil and Potatoes
Add 4-6 inches of a soil mixture (potting soil and compost or manure) to the bottom of the sack. Place your seed potatoes about 5 inches apart. You can plant 3-5 seed potatoes per sack, depending on the size.
Step 4: Cover and Wait
Cover the potatoes with another 4-6 inches of soil and water thoroughly. Keep the soil moist but not waterlogged.
Step 5: Keep Adding Soil
When the potato plants reach about 12 inches tall, roll up the sides of the sack and add more soil to cover the lower third of the plant. Repeat this process as the plant grows, which encourages more tubers to form along the buried stems.
Step 6: Watering and Care
Keep the soil consistently moist, especially during dry spells. Optionally, apply a balanced, slow-release fertilizer every four weeks.
Step 7: Watch for Pests and Diseases
Inspect your plants for pests and diseases. Potato blight can be avoided by choosing resistant varieties and ensuring good air circulation around the sacks.
Step 8: Harvesting
Your potatoes are ready when the foliage begins to die back and yellow. Stop watering a few days before harvesting to allow the potatoes to cure. To harvest, tip the sack over and sift through the soil to collect your potatoes.
The Surprising Trick: Coffee Grounds
Here’s the trick that will amaze you: adding coffee grounds to your soil mixture. Coffee grounds are slightly acidic, which is perfect for potatoes, as they thrive in slightly acidic soil. Additionally, coffee grounds improve soil structure and deter soil pests. Mix them into your potting soil for better results.
Conclusion
Growing potatoes in sacks is a fantastic, space-saving method that simplifies the growing process. By adding coffee grounds to your soil mixture, you can increase acidity and deter pests, ensuring a healthier harvest. Whether you’re growing in a backyard or on a balcony, this method will make growing potatoes easier and more productive than ever. Give it a try and enjoy a bountiful crop of homegrown potatoes!