Hydroponics is an innovative gardening technique that enables you to grow plants efficiently without soil. Using nutrient-rich water solutions, you can optimize growth and enjoy the benefits of fresh produce, even in limited spaces.
Benefits of Hydroponics
- Accelerated Growth: Plants grow up to 25% faster and yield up to 30% more compared to soil-grown counterparts.
- Water Efficiency: Saves up to 90% water, making it ideal for drought-prone areas.
- Space Optimization: Perfect for urban gardening in apartments or small yards.
- Reduced Pests & Diseases: Eliminates soil-borne pathogens, minimizing risks.
- Year-Round Growing: Controlled environments allow gardening in any season.
Common Hydroponic Systems
Hydroponic systems come in various designs, each suited to different plant types and growing conditions:
- Wick System: Passive system using a wick to draw nutrients to plant roots.
- Deep Water Culture (DWC): Plants float in oxygenated, nutrient-rich water.
- Nutrient Film Technique (NFT): A shallow stream of nutrient solution flows past the plant roots.
- Ebb and Flow (Flood and Drain): Alternates flooding and draining of the grow tray.
- Drip System: Nutrient solution drips directly onto each plant’s base.
- Aeroponics: Roots hang in the air and are misted with nutrients.
How to Build a DIY Deep Water Culture (DWC) System
Materials Needed:
- Reservoir: A large plastic container or storage tub (10-20 gallons works well).
- Lid: A sturdy lid that fits the container.
- Net Pots: 2-3-inch net pots for holding plants.
- Growing Medium: Hydroton (clay pellets), Rockwool, or coco coir.
- Air Pump and Air Stone: For oxygenating the water.
- Hydroponic Nutrients: Water-soluble nutrients specific to plant types.
- pH Control Kit: To ensure optimal nutrient uptake.
- Plants or Seeds: Choose crops like lettuce, herbs, tomatoes, or peppers.
Step-by-Step Instructions:
- Set Up the Reservoir:
- Fill the container with water, leaving about 1-2 inches of space from the top.
- Mix hydroponic nutrients according to package instructions.
- Adjust the pH to the ideal range (typically 5.5-6.5).
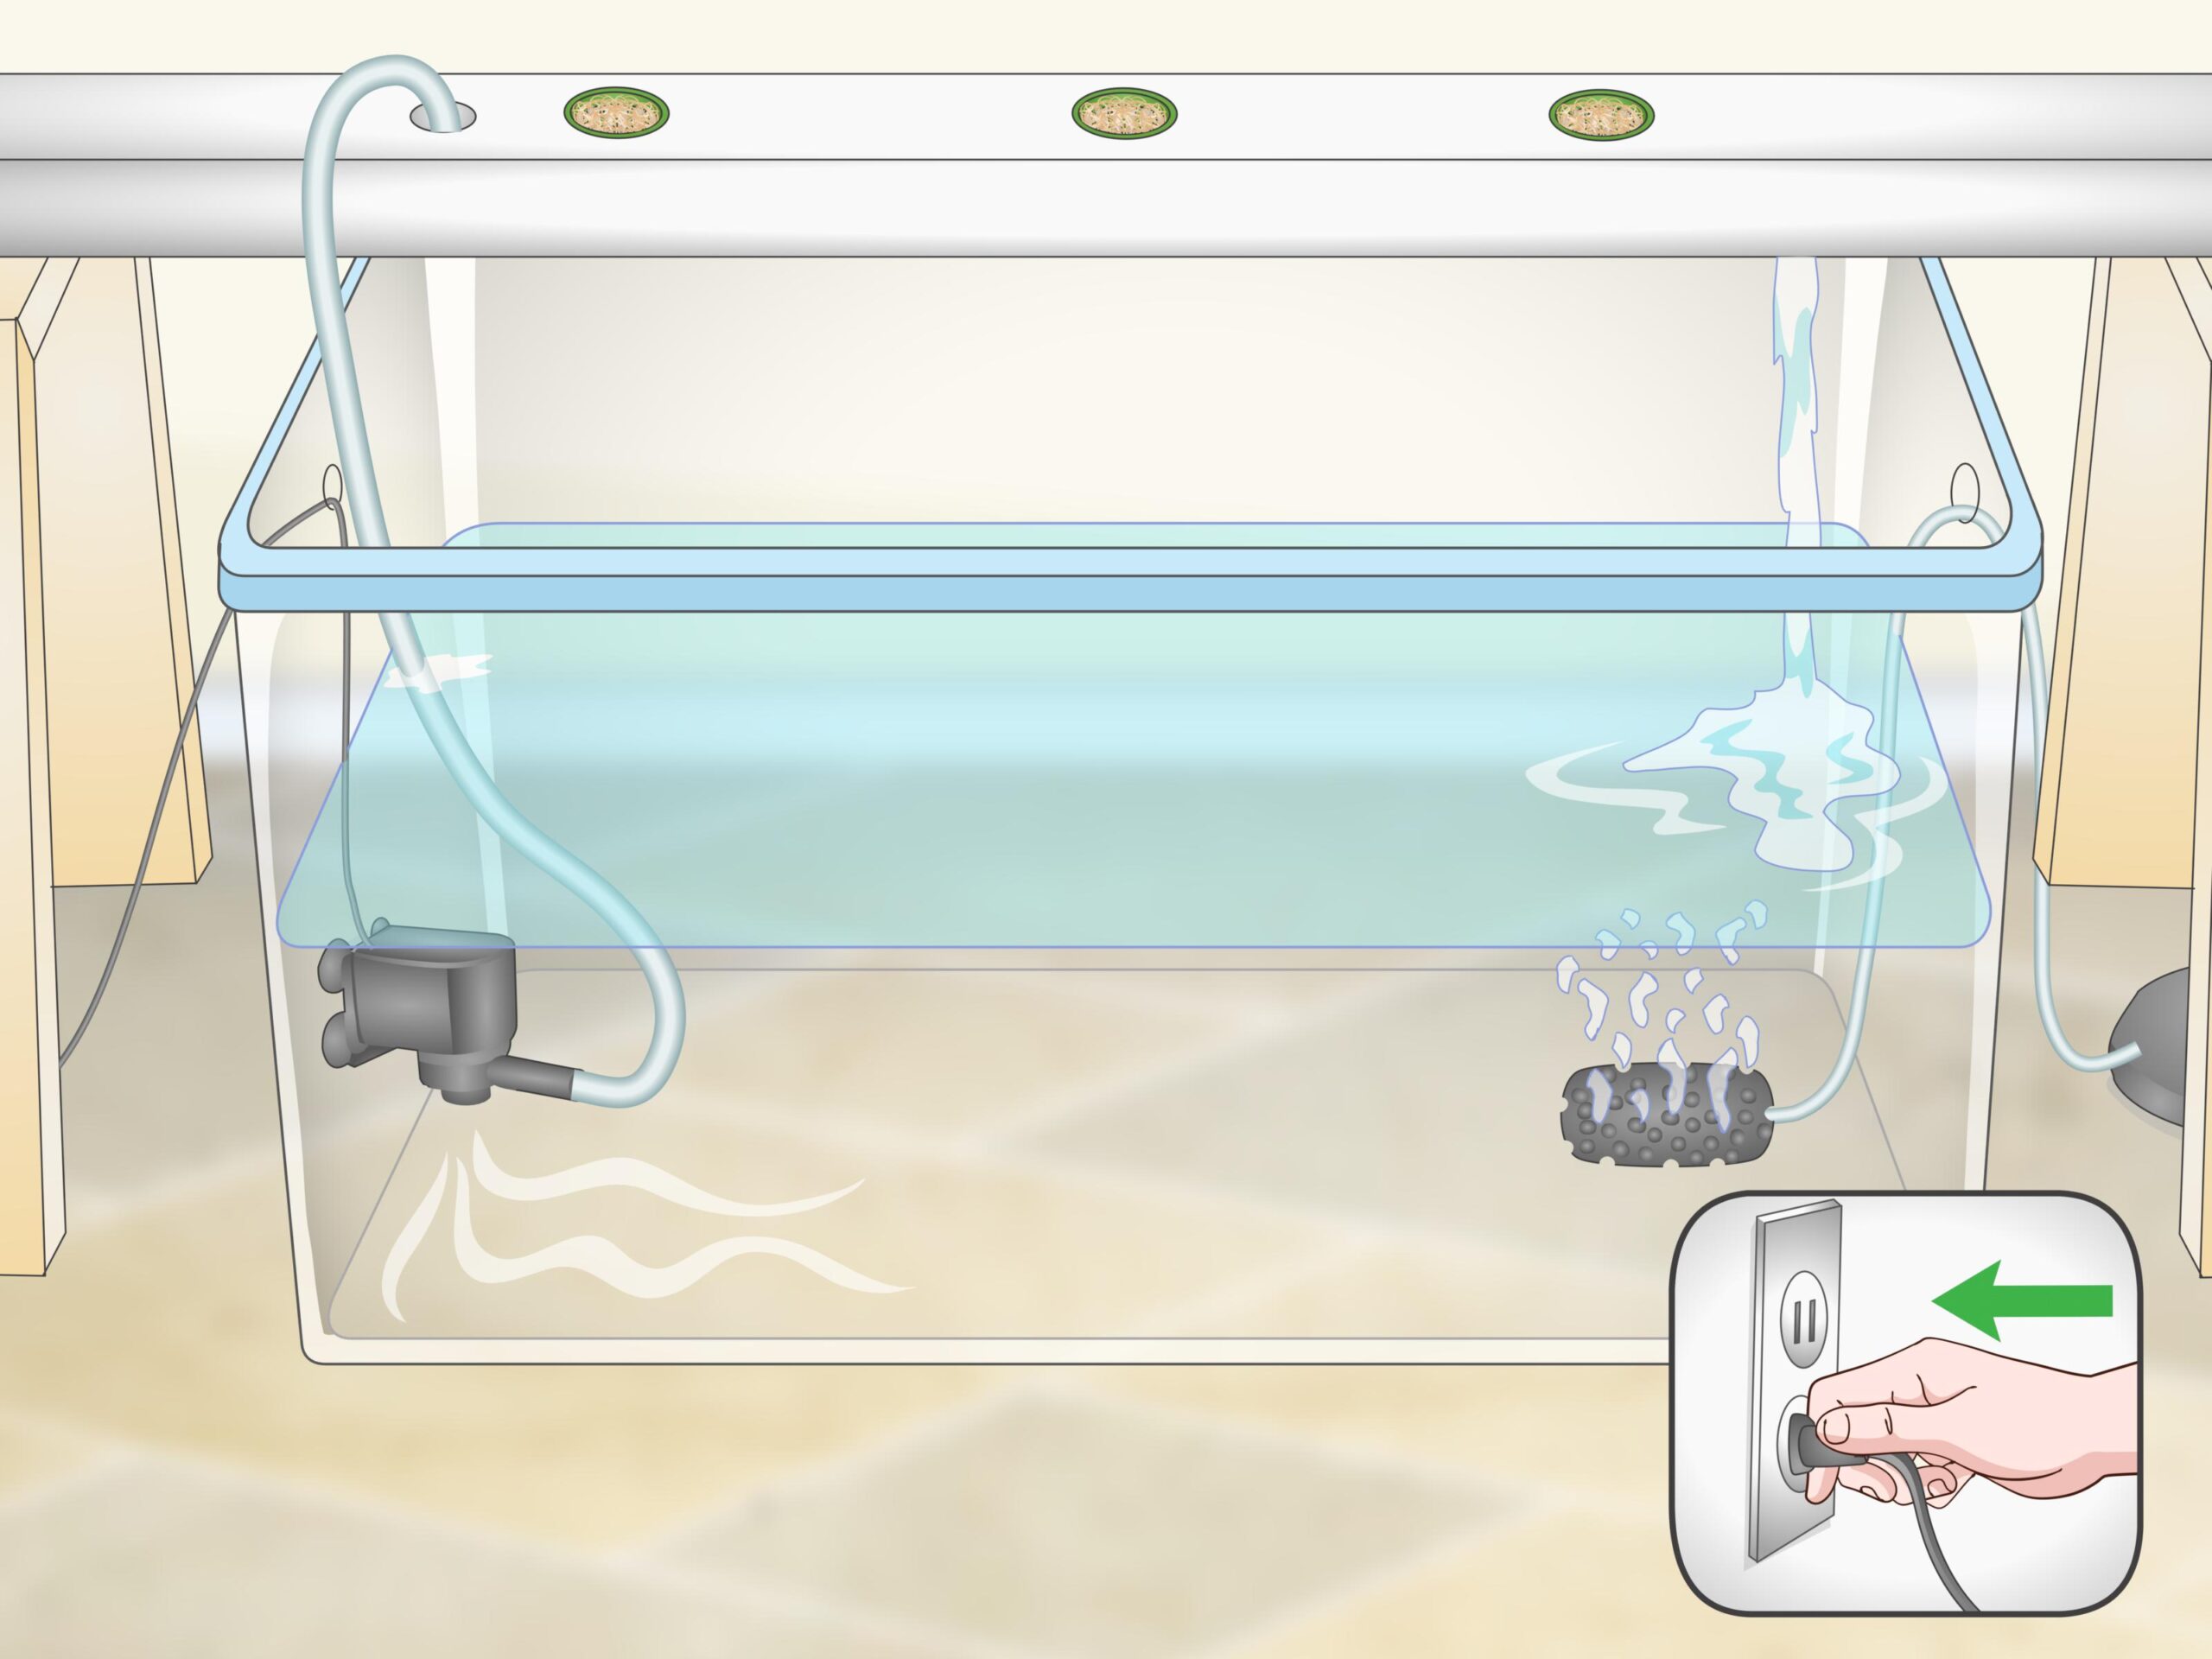
- Install Air Supply:
- Connect the air pump to the air stone using tubing.
- Place the air stone in the reservoir to ensure constant oxygenation.
- Prepare the Lid:
- Cut holes in the lid slightly smaller than the diameter of your net pots.
- Ensure net pots fit snugly without falling through.
- Plant Setup:
- Fill net pots with the growing medium.
- Place seeds or seedlings in the medium, ensuring roots can reach the nutrient solution.
- Assemble the System:
- Place the lid on the container with net pots inserted.
- Turn on the air pump to oxygenate the water.
- Lighting and Environment:
- Position your system in a well-lit area or use LED grow lights.
- Maintain a temperature between 68°F and 72°F (20°C – 22°C).
Tips for Maintenance
- Monitor Nutrient Levels: Refill the reservoir as water levels decrease, and replace nutrients every 1-2 weeks.
- Check pH Regularly: Test and adjust pH levels to maintain an optimal range.
- Prevent Algae Growth: Cover the reservoir with opaque materials to block light.
- Inspect Plants Daily: Look for signs of deficiency, pests, or disease.
- Clean Regularly: Disinfect the system between crop cycles to prevent contamination.
Ideal Plants for Hydroponics
- Leafy Greens: Lettuce, spinach, kale.
- Herbs: Basil, mint, cilantro.
- Fruiting Plants: Tomatoes, peppers, cucumbers.
- Flowers: Orchids, petunias.
Conclusion
Creating a hydroponic system at home is a sustainable, rewarding way to grow plants efficiently. With careful planning and consistent care, you’ll enjoy fresh, nutritious produce year-round. Dive into hydroponics and transform your space into a lush, productive garden!