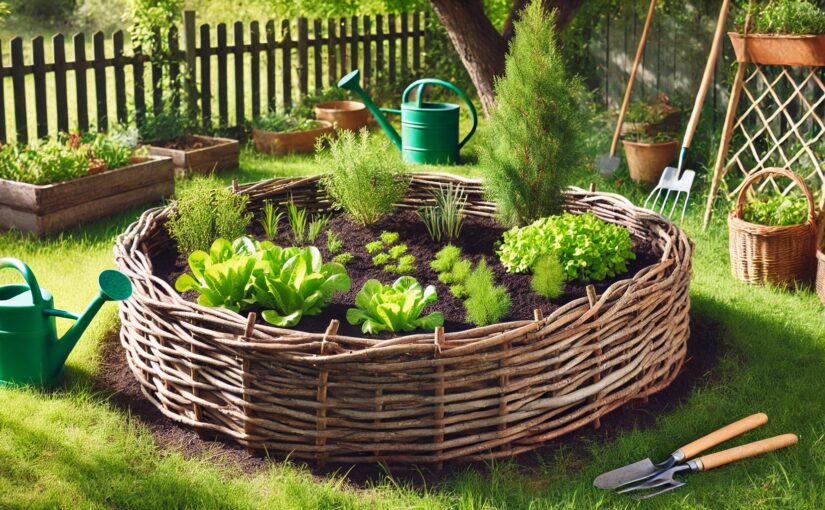
Wattle weaving, a traditional craft dating back centuries, offers a practical and aesthetic way to enhance your garden. By interlacing flexible branches or twigs like willow or hazel, you can create a sturdy, eco-friendly raised garden bed that adds rustic charm to your outdoor space. This step-by-step guide will walk you through the process, from planning to planting, so you can build your very own wattle garden bed.
Materials Needed
Gather the following materials before you begin:
- Flexible branches or twigs (Willow and hazel work best for their flexibility and durability)
- Sturdy stakes (2 feet longer than the desired height of your bed)
- Hammer or mallet
- Pruning shears
- Garden gloves
- Measuring tape
- Soil and compost mix
Step-by-Step Guide
1. Planning and Design
- Decide on the location and size of your raised garden bed. Choose a spot that receives sufficient sunlight based on the plants you intend to grow.
- Sketch a rough design, including the dimensions and shape (rectangular, circular, or custom).
2. Preparing the Site
- Clear the area of weeds, grass, and debris.
- Level the ground to ensure stability for the bed.
- Mark the outline of the bed using string, chalk, or stakes.
3. Gathering Materials
- Collect long, flexible branches or twigs. Freshly cut, green wood is easier to work with.
- Cut the branches into uniform lengths, considering the height and circumference of your planned bed.
4. Installing the Stakes
- Cut the stakes to the appropriate length, adding 2 feet for anchoring into the ground.
- Drive the stakes into the ground along the perimeter of the bed, spacing them evenly (about 6–12 inches apart). Leave about 2 feet of each stake above ground.
5. Weaving the Wattle
- Begin weaving at one corner, threading the branches horizontally through the stakes.
- Alternate the starting side of each branch to create a tight, interlocking pattern.
- Bend and shape the branches gently as you weave, ensuring they are snug against the stakes.
- Trim excess branch ends with pruning shears for a neat appearance.
6. Building Up the Walls
- Continue adding layers of woven branches until the walls reach your desired height.
- Ensure each layer is tightly packed for stability and durability.
7. Securing the Top
- Tuck the ends of the final layer of branches securely into the weave.
- Optionally, add a rigid border (like a thicker branch) along the top edge for a polished finish.
8. Filling with Soil
- Mix garden soil with compost to create a nutrient-rich growing medium.
- Fill the raised bed with this soil-compost mixture, leaving a few inches of space at the top.
9. Planting
- Choose plants appropriate for the size of your bed and its sunlight conditions.
- Plant seeds or seedlings according to their specific needs, following recommended spacing and depth.
10. Maintenance
- Water regularly, keeping the soil consistently moist but not waterlogged.
- Add mulch to help retain moisture and suppress weeds.
- Inspect the wattle structure periodically, pruning or repairing as necessary to maintain its integrity.
Benefits of a Wattle Raised Garden Bed
- Eco-Friendly: Utilizes natural, biodegradable materials for a sustainable gardening solution.
- Rustic Charm: Adds a timeless, rustic aesthetic to your garden.
- Durability: Properly woven wattle beds can last for years with maintenance.
- Customization: Flexible design options allow you to create unique shapes and sizes to fit your space.
Tips for Success
- Use freshly cut, green branches for easier bending and weaving.
- Ensure branches are flexible and long enough to interlock securely.
- Regular maintenance, including pruning and repairing loose weaves, will prolong the life of the bed.
Conclusion
Building a wattle raised garden bed is a rewarding DIY project that combines functionality, sustainability, and beauty. While it requires time and effort, the result is a durable, rustic garden bed perfect for growing your favorite plants. Whether you’re an experienced gardener or a DIY enthusiast, this project offers a practical way to enhance your outdoor space and enjoy the satisfaction of working with natural materials.
Happy gardening!