Growing cloves at home is a satisfying endeavor, connecting gardeners to the origins of this prized spice. The process, while requiring patience, is straightforward and rewarding. From seed germination to harvesting the aromatic buds, here’s a comprehensive guide to successfully cultivating a clove plant.
Step 1: Germinating Clove Seeds
Germinating clove seeds is the first and most crucial step in starting your clove-growing journey.
Materials Needed:
- Fresh clove seeds (not dried cooking cloves)
- Small pots or seed trays
- Well-draining potting soil (a mix of compost, sand, and loam)
- Plastic wrap or a propagation dome
- Warm water
Steps to Germinate Clove Seeds:
- Select High-Quality Seeds:
- Ensure the seeds are fresh and viable. Seeds from dried cloves used in cooking will not germinate. Choose plump, undamaged seeds sourced from a clove tree or trusted supplier.
- Soak the Seeds:
- Soak the seeds in warm water for 24 hours to soften their hard shell, making germination easier.
- Prepare Pots or Trays:
- Fill small pots or seed trays with a well-draining potting mix, leaving about an inch of space at the top.
- Plant the Seeds:
- Sow the seeds about 1 inch deep into the soil. Place one seed per pot or space them 2-3 inches apart in seed trays.
- Cover for Moisture and Warmth:
- Cover the pots or trays with clear plastic wrap or a transparent propagation dome. This creates a greenhouse effect, retaining moisture and warmth to aid germination.
- Provide Ideal Conditions:
- Place the pots in a warm location with indirect sunlight. Maintain consistent soil moisture without waterlogging.
- Wait for Germination:
- Clove seeds can take several weeks to months to germinate, so patience is essential. Once seedlings emerge, remove the plastic cover and provide filtered sunlight.
Step 2: Transplanting Clove Seedlings
Once the seedlings are sturdy, they can be transplanted into larger pots or garden beds.
Materials Needed:
- Larger pots with good drainage or garden space
- Rich, well-draining potting mix
- Balanced, slow-release fertilizer
Steps to Transplant Seedlings:
- Prepare the Pot or Bed:
- Use a potting mix rich in organic matter. Ensure the pot or garden area has excellent drainage.
- Transplant the Seedlings:
- Carefully remove seedlings from the germination pots without damaging their roots. Transplant them into larger pots or the ground, spacing them 2-3 feet apart.
- Water Thoroughly:
- Water the seedlings immediately after transplanting to help them settle into their new environment.
Step 3: Caring for Clove Plants
Clove plants require tropical conditions to thrive, with consistent warmth and humidity.
Key Care Tips:
- Light and Temperature:
- Clove trees thrive in partial shade with warm temperatures ranging between 60°F to 90°F (15°C to 32°C).
- Watering:
- Maintain evenly moist soil but avoid overwatering. Let the top inch of soil dry slightly before watering again.
- Humidity:
- Clove plants prefer high humidity. Use a humidifier, mist the leaves regularly, or place a tray of water nearby to boost humidity.
- Fertilization:
- Feed the plants every few months with a balanced, slow-release fertilizer or organic compost.
- Pruning:
- Trim dead or damaged branches to encourage bushy growth and improve airflow around the plant.
Step 4: Harvesting Cloves
Patience is vital, as clove trees typically take 4-7 years to begin producing flower buds.
How to Harvest Cloves:
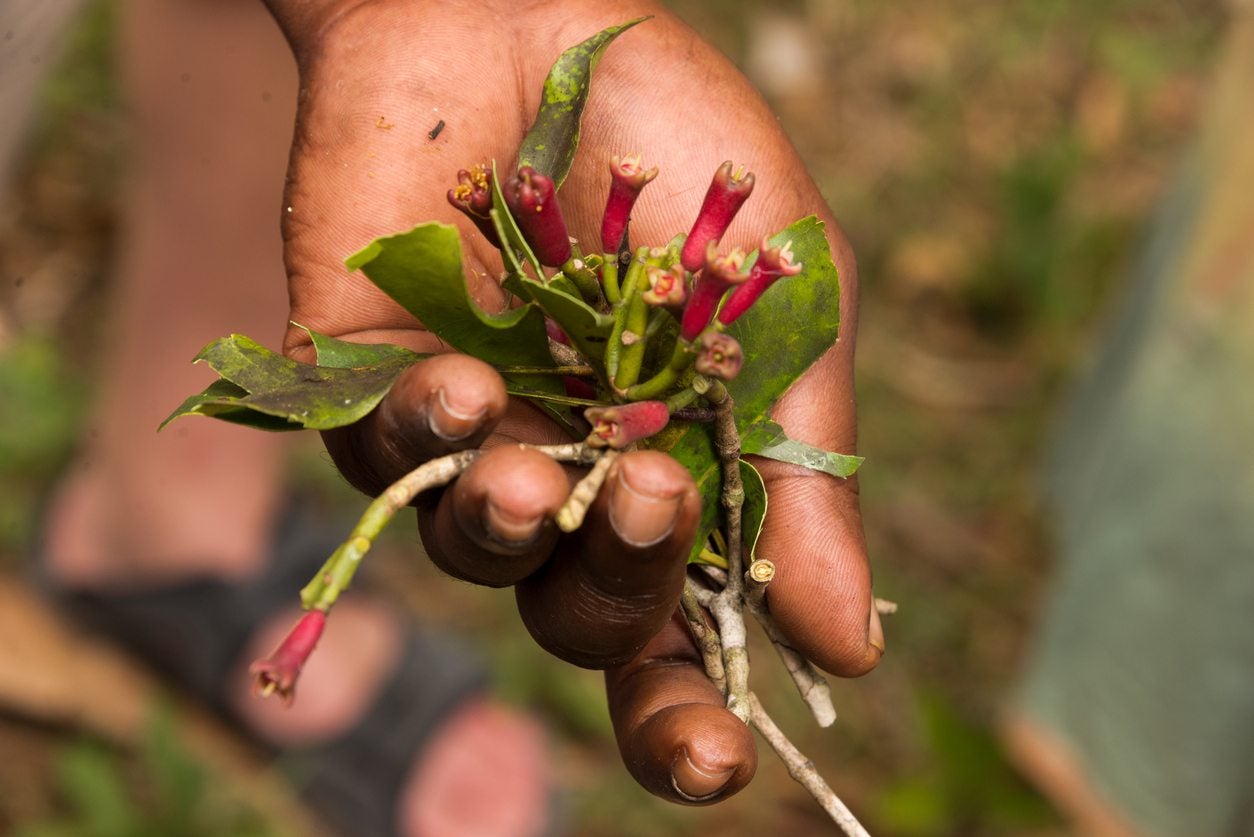
- Monitor Flower Buds:
- Cloves are ready for harvest when the buds are still closed and turn a pinkish hue.
- Harvesting:
- Hand-pick the buds carefully, as bruising can reduce their quality.
- Drying the Cloves:
- Spread the harvested buds in a shaded, well-ventilated area to dry for several days. Dried cloves are ready for use when they become dark brown and snap easily.
Step 5: Storing Your Cloves
Store dried cloves in an airtight container in a cool, dry place. Properly stored, they retain their flavor and aroma for years.
Benefits of Growing Cloves at Home
- Sustainability: Enjoy a renewable source of a valuable spice.
- Organic Quality: Ensure your cloves are free from chemicals and additives.
- Versatility: Use your homegrown cloves in cooking, teas, or for their medicinal benefits.
By following this guide, you’ll not only grow your own clove plant but also deepen your appreciation for this remarkable spice. With care and patience, you’ll soon have a thriving clove tree that rewards you with aromatic buds and a sense of accomplishment. Happy gardening!