Bell peppers, often called “sweet peppers,” are a staple in home gardens and kitchens alike. Recognizable by their iconic bell shape, these vibrant fruits come in a dazzling spectrum of colors, including green, red, yellow, orange, purple, and even brown. Their crisp texture and mild sweetness make them indispensable in salads, stir-fries, and countless other dishes.
Beyond their culinary appeal, bell peppers are a rewarding crop for home gardeners. They’re space-efficient, adaptable, and relatively easy to grow with proper care. Whether you’re a gardening novice or a seasoned pro, this guide will equip you with everything you need to know to cultivate juicy, crunchy bell peppers right in your backyard or patio.
1. Start Seeds Indoors for a Strong Beginning
Bell peppers thrive when started indoors, particularly in regions with long winters or unpredictable weather. Starting seeds indoors gives you a head start on the growing season and ensures healthier plants.
How to Start Seeds:
- Begin 6 to 8 weeks before the last expected frost in your region.
- Use small containers, such as seed trays or small pots, and fill them with a lightweight seed-starting mix for optimal drainage and nutrient availability.
- Plant 2 to 3 seeds per container, pressing them about 1/4 inch deep into the soil.
- Keep the soil consistently moist, but not soggy, and cover the containers with a clear plastic dome or wrap to retain humidity.
- Place the containers in a warm location (75–80°F) or use a heat mat to promote germination.
Light Requirements:
Once seeds germinate (7–10 days), move the seedlings to a bright location, such as a sunny windowsill or under grow lights, to prevent spindly growth. Peppers need at least 12–16 hours of light daily for robust development.
Thinning Seedlings:
After the seedlings grow their first true leaves, thin them by snipping off the weaker plants at the soil line, leaving the strongest seedling in each pot.
2. Transplanting Seedlings Outdoors
Bell peppers are heat-loving plants that won’t thrive in cold soil or air temperatures. Wait until daytime temperatures consistently reach 70°F (21°C) and nighttime temperatures stay above 55°F (13°C) before transplanting outdoors.
Hardening Off Seedlings:
- About 7–10 days before transplanting, start hardening off your seedlings to acclimate them to outdoor conditions.
- Gradually expose them to sunlight and outdoor temperatures, starting with a couple of hours each day and increasing exposure over time.
How to Transplant:
- Choose a sunny spot in your garden where the plants will receive 6–8 hours of direct sunlight daily.
- Space plants about 24 inches apart in rows or clusters to provide ample room for growth while allowing the leaves to shade each other during intense heat.
- Use nutrient-rich, well-draining soil. Consider adding compost or aged manure to enrich the soil with essential nutrients.
- Water thoroughly immediately after transplanting to help the plants settle into their new environment.
3. Mulch: A Gardener’s Secret Weapon
Mulching is a simple yet effective way to boost your pepper plants’ health and productivity.
Benefits of Mulch:
- Suppresses weed growth, reducing competition for nutrients.
- Retains soil moisture, keeping roots hydrated during dry spells.
- Regulates soil temperature, protecting roots from extreme heat.
Spread a 2–3 inch layer of organic mulch, such as straw, grass clippings, pine needles, or bark chips, around the base of your plants. Avoid piling mulch directly against the stems to prevent rot.
4. Mastering Watering Techniques
Bell peppers require consistent watering to thrive, but overwatering can lead to root rot and fungal issues. Aim to provide 1–2 inches of water per week, adjusting based on weather conditions.
Tips for Effective Watering:
- Water deeply at the base of the plant to encourage deep root growth.
- Avoid overhead watering to reduce the risk of diseases like powdery mildew.
- Use drip irrigation or soaker hoses for even moisture distribution.
During extremely hot or dry periods, check the soil frequently and increase watering as needed.
5. Fertilizing for Maximum Growth and Yield
Peppers are heavy feeders and need periodic fertilization to support healthy growth and fruit production.
When and How to Fertilize:
- Apply a balanced fertilizer (e.g., 10-10-10) or one specifically formulated for vegetables.
- Wait until the plants begin to flower before applying fertilizer. Early applications encourage excessive foliage growth at the expense of fruit development.
- Feed plants every 2–3 weeks during the growing season.
For an organic approach, consider using compost tea, fish emulsion, or aged manure.
6. Protecting Your Plants from Pests
While bell peppers are relatively hardy, they can fall victim to various pests.
Common Pests:
- Aphids: Tiny, sap-sucking insects often found on new growth.
- Cutworms: Larvae that chew through stems at the soil line.
- Pepper weevils: Small beetles that damage flowers and fruit.
- Spider mites: Microscopic pests that cause yellowing and stippling on leaves.
Prevention and Treatment:
- Inspect plants regularly for signs of pests.
- Use organic insecticidal soap or neem oil to treat infestations.
- Encourage beneficial insects like ladybugs and lacewings to control pest populations naturally.
7. Harvesting: When and How to Pick
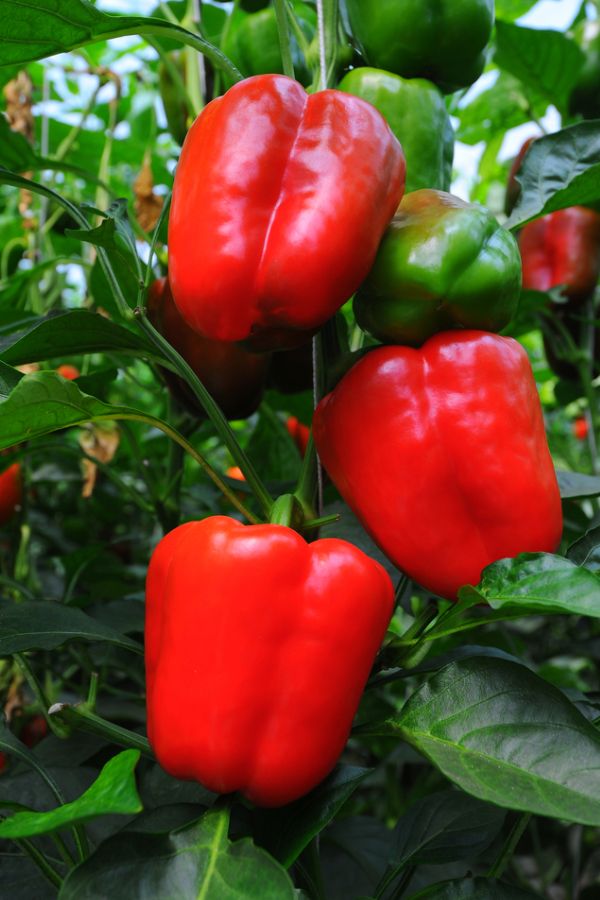
The beauty of bell peppers lies in their versatility—you can harvest them at different stages of ripeness depending on your taste preferences.
When to Harvest:
- Green peppers are immature fruits that will continue to ripen on the plant.
- Allow peppers to turn red, yellow, orange, or purple for sweeter flavor and higher nutrient content.
How to Harvest:
- Use sharp scissors or pruning shears to cut the stem 1–2 inches above the fruit, preventing damage to the plant and fruit.
- Harvesting regularly encourages the plant to produce more fruit throughout the season.
Extra Tips for Success
- Growing in Containers: If you’re short on garden space, grow bell peppers in large pots (12–14 inches in diameter). Use a lightweight, well-draining potting mix and ensure the container has drainage holes.
- Companion Planting: Plant bell peppers near basil, carrots, or marigolds to deter pests and enhance growth.
- Staking: Provide support for taller plants to prevent branches from breaking under the weight of heavy fruit.
Why Grow Bell Peppers?
Bell peppers aren’t just delicious—they’re packed with nutrients like vitamin C, vitamin A, and antioxidants, making them a healthy addition to your meals. Whether you grow them in garden beds, raised beds, or containers, bell peppers are a low-maintenance, high-reward crop that will add color and flavor to your garden and plate.
By following these detailed steps, you’ll enjoy a bountiful harvest of juicy, crunchy bell peppers, perfect for elevating your culinary creations. Happy gardening!