Gardening is both an art and a science, and for those with limited space, finding innovative methods to grow crops can be a challenge. Potato towers offer an ingenious solution to this problem, allowing gardeners to grow a significant yield in a small footprint. Whether you have a backyard, a balcony, or even just a small patio, a potato tower can be your gateway to cultivating this staple crop. In this comprehensive guide, you’ll learn the benefits of a potato tower, the materials needed, detailed steps to construct one, and essential tips for achieving a bountiful harvest.
Why Build a Potato Tower?
Potato towers are designed with efficiency and convenience in mind. They’re a vertical gardening solution that is perfect for urban spaces or for gardeners looking to experiment with innovative techniques. Here are some key reasons to consider building one:
1. Space Efficiency
Potato towers are ideal for small gardens, balconies, or other areas where ground space is limited. By growing vertically, you can maximize the number of potatoes harvested from a confined area.
2. Simplified Harvesting
Forget about the backbreaking labor of digging potatoes out of the ground. With a potato tower, you simply remove layers of soil and straw from the sides, revealing your harvest with ease.
3. Protection Against Pests and Diseases
Growing your potatoes off the ground significantly reduces their exposure to soil-borne pests like wireworms and diseases such as blight.
4. Enhanced Growth Conditions
The tower’s structure ensures better aeration and drainage, two crucial factors for healthy potato plants.
5. Versatility
Potato towers can be placed almost anywhere with adequate sunlight. Whether you’re gardening in a yard or on a balcony, these structures adapt to your needs.
Materials You’ll Need
To build a sturdy and effective potato tower, gather the following items:
- Wire fencing or a large mesh cylinder (2–3 feet in diameter and 3–4 feet tall)
- Straw, preferably weed-free (this acts as a barrier and retains moisture)
- Compost and garden soil (for a nutrient-rich growing medium)
- Certified seed potatoes (healthy, disease-free starters for your crop)
- Gardening gloves (to protect your hands during assembly)
- Watering can or hose (for consistent hydration)
Optional: A platform with wheels for mobility, especially useful if you need to relocate the tower.
Step-by-Step Instructions for Building Your Potato Tower
Step 1: Find the Perfect Location
Potatoes need plenty of sunlight to grow well. Choose a spot that gets at least six hours of direct sunlight per day. If growing on a balcony or patio, ensure the space has sufficient light exposure and that the surface can support the tower’s weight.
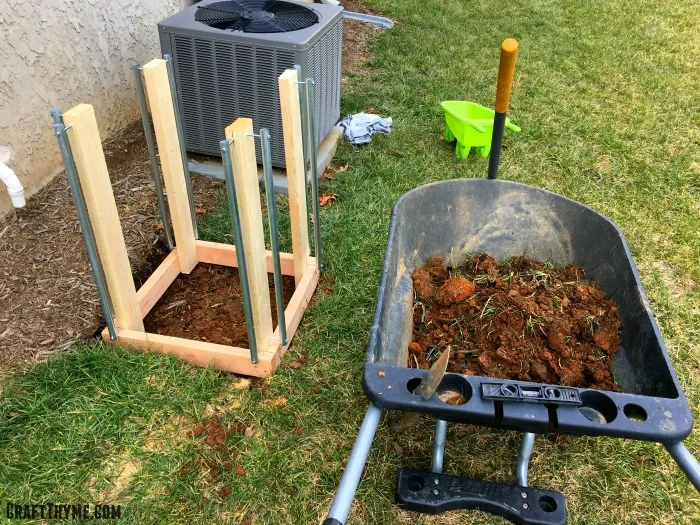
Step 2: Construct the Tower Framework
- Cut a piece of wire fencing or mesh to form a cylinder that’s about 2–3 feet in diameter and 3–4 feet tall.
- Secure the edges of the wire with zip ties, clips, or sturdy wire to create a stable, circular structure.
- Position the tower where you plan to grow your potatoes, as moving it later may be challenging.
Step 3: Prepare the Base Layer
- Lay a thick layer of straw (about 3–4 inches) at the bottom of the tower. This helps with drainage and prevents the soil from compacting.
- Add a 6-inch layer of soil and compost mixture on top of the straw to create a nutrient-rich base.
Step 4: Plant Your Seed Potatoes
- Place seed potatoes directly onto the soil layer. Position them so the “eyes” (growth points) face upward.
- Space the potatoes approximately 6 inches apart to ensure they have enough room to grow.
- Cover the seed potatoes with an additional 6-inch layer of the soil-compost mix.
Step 5: Build Up the Tower as Plants Grow
- Once the potato plants begin to sprout and grow above the soil surface, add a layer of straw around the interior walls of the tower.
- Follow this by adding more soil and compost, burying the stems while leaving only the top few inches of foliage exposed.
- Repeat this process as the plants grow taller, continuing to build up the soil and straw layers. This encourages the development of additional potatoes along the buried stems.
Step 6: Watering and Maintenance
- Keep the soil consistently moist but avoid overwatering, as excess moisture can lead to rot.
- Use a watering can or hose with a gentle spray to prevent displacing the soil.
- Regularly check for pests, such as aphids or beetles, and address any issues promptly.
Step 7: Harvesting Your Potatoes
- Potatoes are typically ready to harvest once the foliage turns yellow and begins to die back. This usually occurs about 2–4 months after planting, depending on the potato variety.
- To harvest, gently remove the straw and soil layers from the sides of the tower. The potatoes will be easily accessible without the need for digging.
Pro Tips for a Successful Potato Tower
- Choose High-Quality Seed Potatoes: Opt for certified seed potatoes to minimize the risk of disease and ensure a healthy crop.
- Experiment with Varieties: Try different types of potatoes, such as Yukon Gold, Red Pontiac, or Russet, to discover which works best in your tower.
- Avoid Overcrowding: While it may be tempting to plant many seed potatoes, overcrowding can reduce the yield and size of your harvest.
- Monitor for Nutrient Deficiency: Yellowing leaves during early growth may indicate a lack of nutrients. Adding compost or an organic fertilizer can help.
- Plan for Mobility: If you need to relocate your tower for better light or protection from weather, consider building it on a wheeled platform.
Why You’ll Love Growing Potatoes in a Tower
Building a potato tower is more than just a gardening project—it’s an innovative way to enjoy fresh, homegrown produce with minimal effort and space. The vertical design is efficient, sustainable, and perfect for both beginner and experienced gardeners. Plus, the simplicity of harvesting makes it a satisfying experience for the whole family.
By following this guide, you’ll be well on your way to cultivating a thriving potato crop. Enjoy the fruits (or tubers!) of your labor and savor the taste of your own homegrown potatoes. Happy gardening