Growing peanuts (Arachis hypogaea) at home can be an exciting and rewarding gardening project. With a bit of care and patience, you can turn raw, store-bought peanuts into a thriving peanut crop. Follow this step-by-step guide to learn how.
Step 1: Choosing the Right Peanuts
- Raw and Unshelled: Select fresh, raw peanuts that are still in their shells. These are more likely to germinate.
- Avoid Processed Nuts: Roasted, salted, or flavored peanuts won’t sprout, so avoid using these.
Step 2: Preparing for Planting
- Long Growing Season: Peanuts need 100–130 frost-free days to mature, so plan accordingly.
- Starting Indoors: In cooler climates, begin planting indoors 5–8 weeks before the last frost date to give your peanuts a head start.
- Soil Preparation: Peanuts thrive in loose, well-draining soil. Improve soil quality by mixing in sand and aged compost.
Step 3: Planting Your Peanuts
- Shell the Peanuts: Gently remove the nuts from their shells, keeping the papery skin intact, as this is essential for germination.
- Sowing Depth: Plant peanuts 1–2 inches deep in the soil.
- Spacing: Space seeds 24–36 inches apart in rows, with rows spaced at least 72 inches apart to allow for sprawling growth.
- Site Selection: Choose a sunny location, as peanuts require full sun to thrive. Use row covers to shield young plants from late spring frosts.
Step 4: Soil and Watering Requirements
- Soil Conditions: Peanuts prefer light, loamy soil with a slightly acidic pH of 5.5–7.0.
- Consistent Moisture: Water plants regularly, providing about 1 inch of water per week. Keep the soil evenly moist but not waterlogged.
- Mulching: Once seedlings reach 6 inches tall, add mulch to retain soil moisture and suppress weeds.
Step 5: Fertilization Tips
- Nitrogen Fixers: Peanuts can produce their own nitrogen, so they require less of it compared to other crops.
- Calcium is Key: Ensure the soil has sufficient calcium, which is vital for proper pod formation. Add gypsum or a calcium-rich amendment if necessary.
- Pre-Plant Fertilizer: Use a balanced or low-nitrogen fertilizer before planting to support healthy growth.
Step 6: Care and Propagation
- Pruning: Peanuts generally don’t require pruning, but you can trim back any damaged or diseased leaves for maintenance.
- Propagation: Save seeds from healthy, mature plants for planting the following spring.
Step 7: Harvesting and Storing
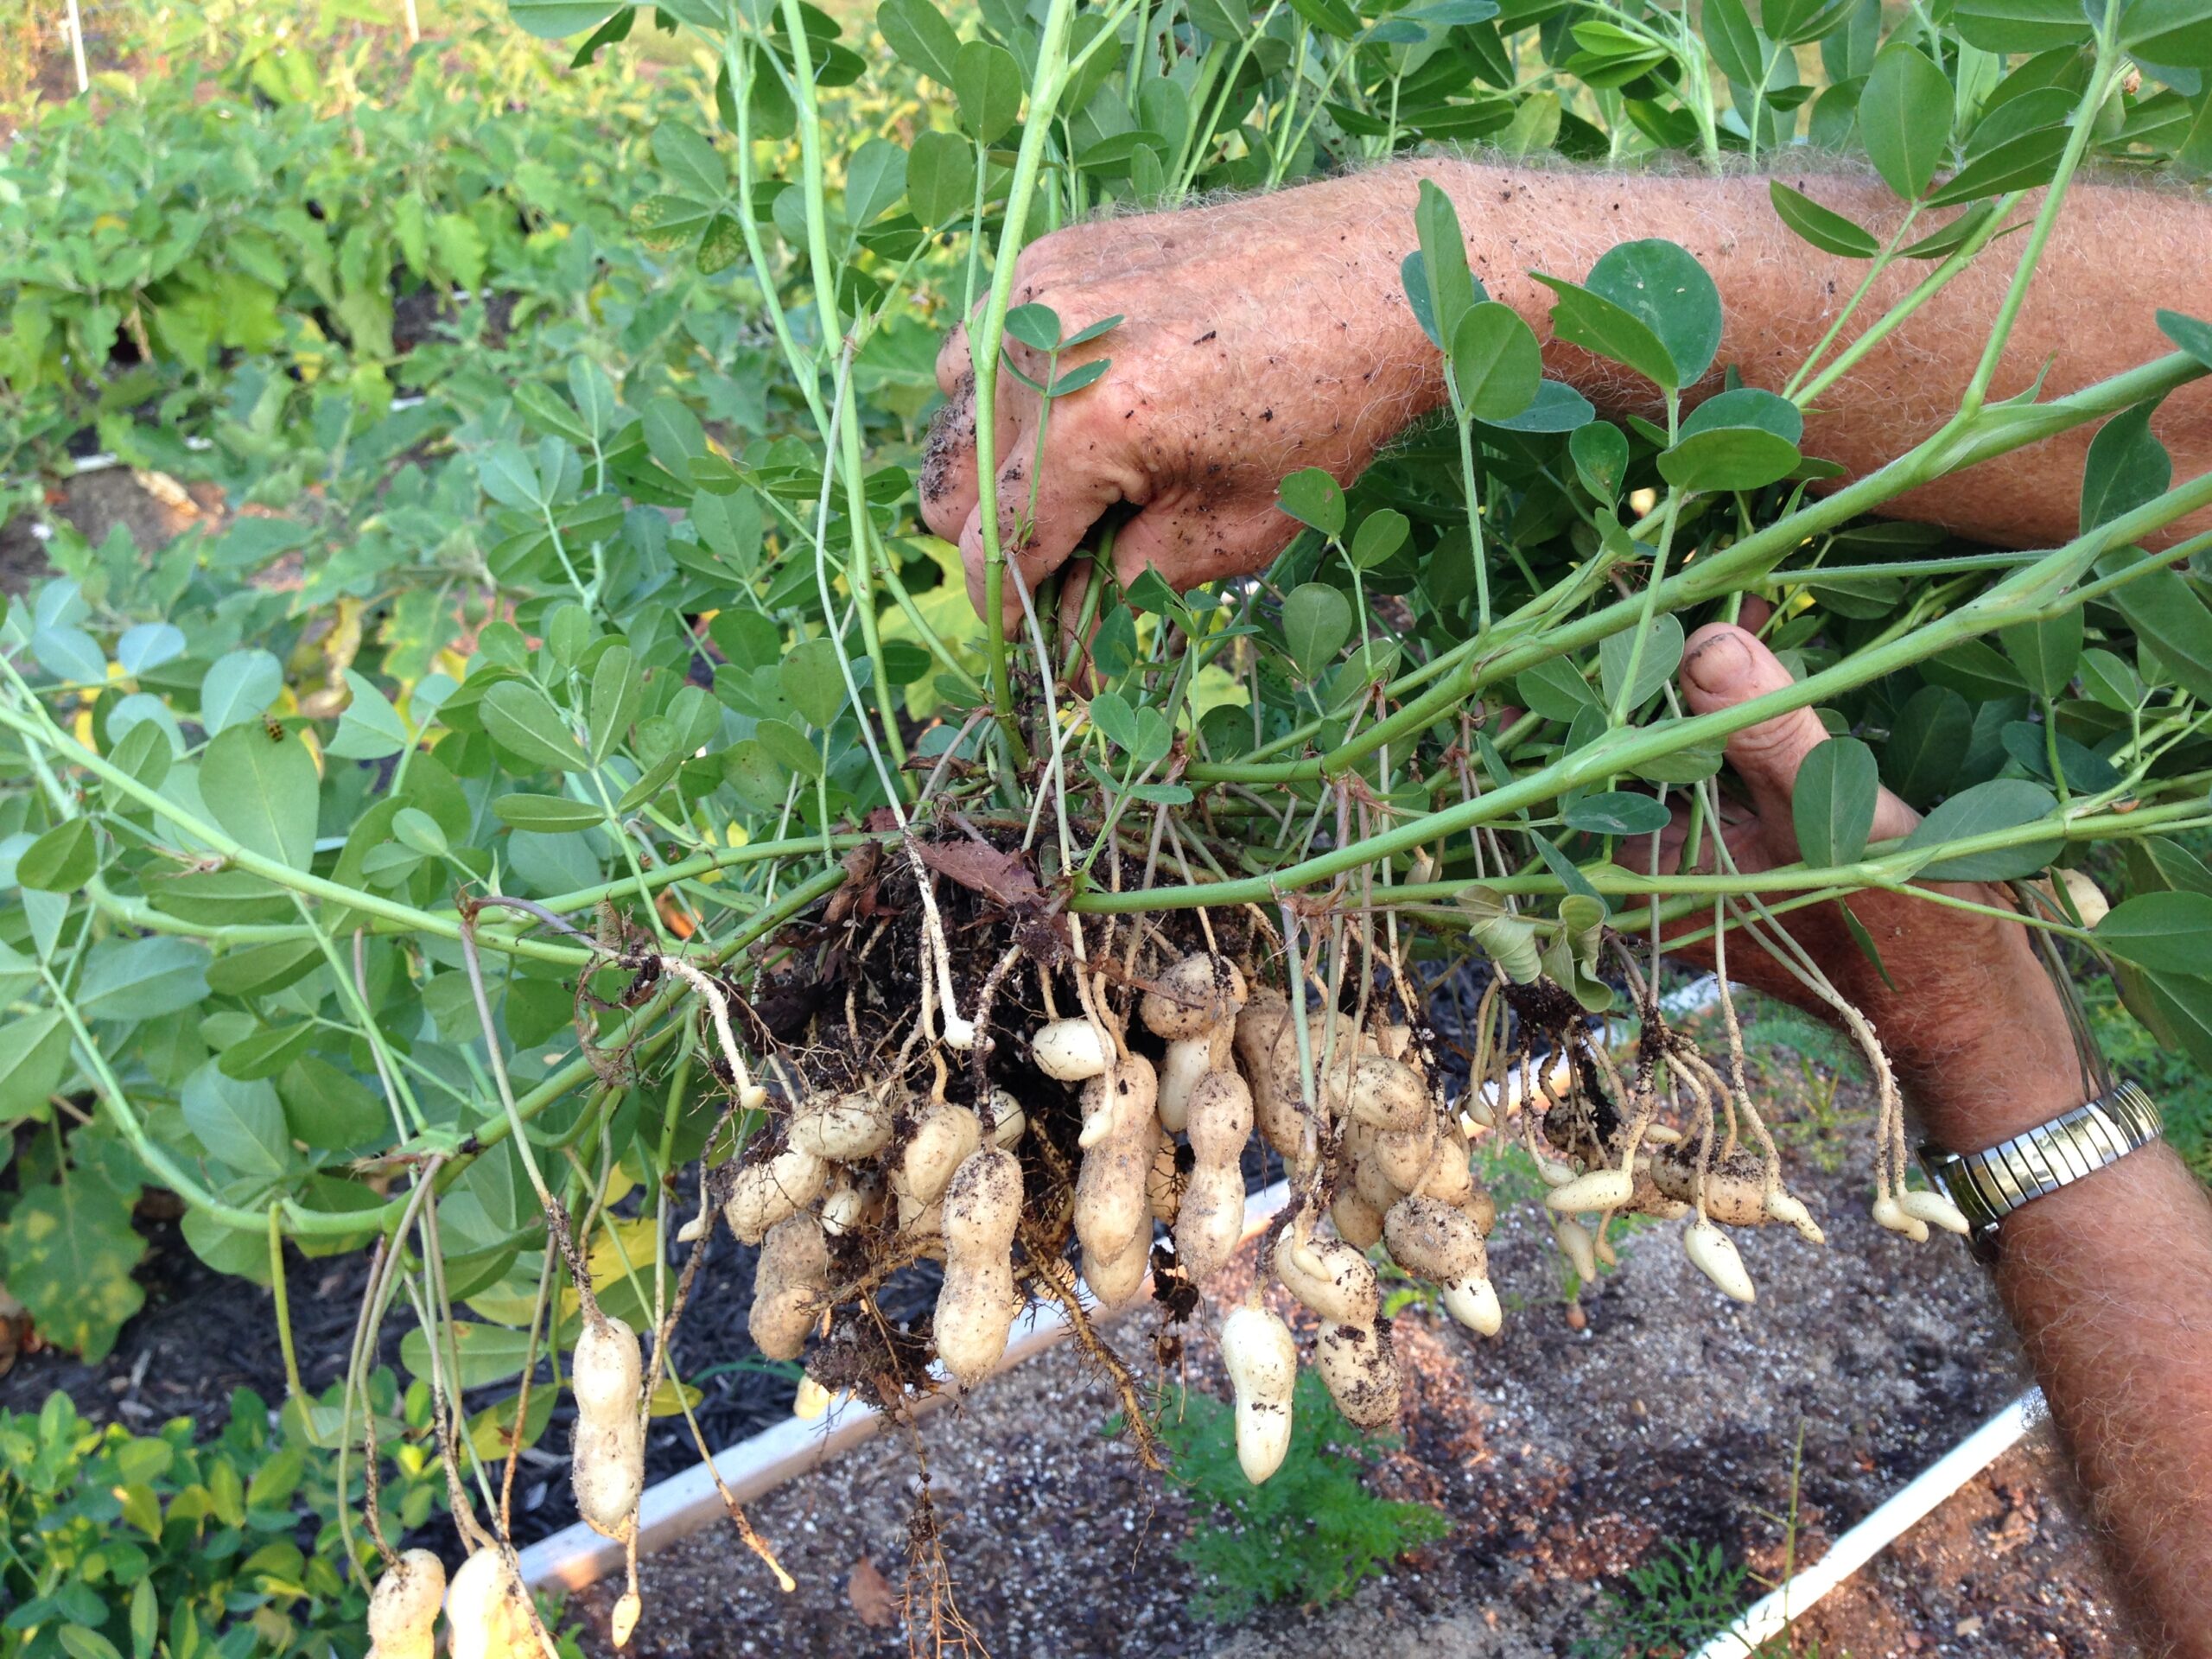
- Harvest Time: Peanuts are ready to harvest about 100–150 days after planting. The plant will begin to yellow, signaling maturity.
- Harvesting: Pull the entire plant from the soil and hang it upside down to dry for a few days in a well-ventilated area.
- Storing: Store raw peanuts in a breathable mesh bag in a cool, dry place, or roast them for a delicious treat.
Tips for Success
- Patience Pays Off: Peanuts take time to mature, so be prepared to wait several months for your harvest.
- Optimal Climate: Peanuts thrive in warm, sunny weather. Ensure your planting schedule aligns with your local growing season.
- Pest Management: Keep an eye out for pests like aphids or nematodes, and take preventive measures if needed.
With a sunny garden spot and proper care, you can enjoy the satisfaction of harvesting your own home-grown peanuts. From planting to roasting, the process is as rewarding as the delicious end result!