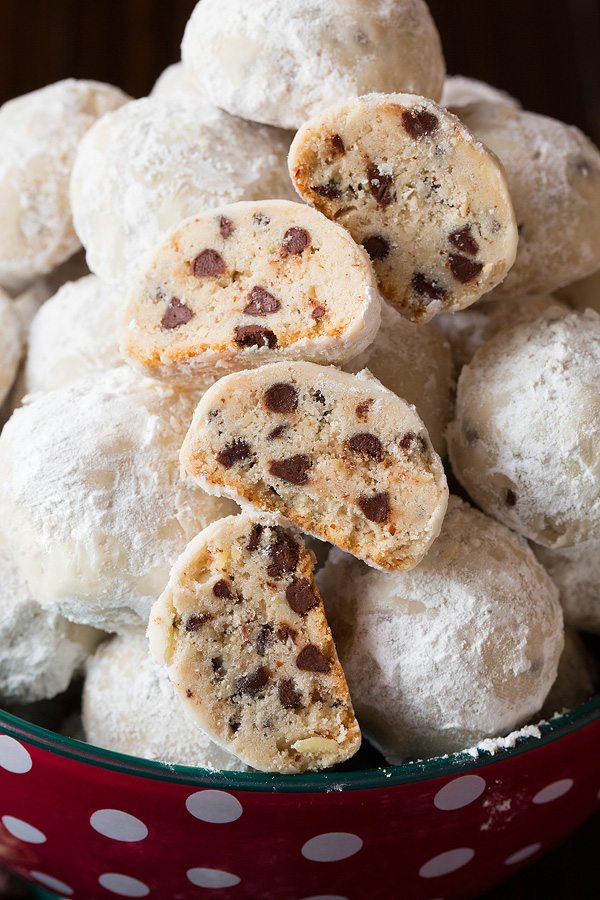
These Snowball Cookies are a perfect combination of simplicity and elegance. Coated in a generous layer of powdered sugar, they have a delicate, melt-in-your-mouth texture that’s sure to be a crowd-pleaser. Whether you are making them for a holiday celebration or just to enjoy with a hot cup of tea or coffee, these cookies are a classic treat everyone loves.
Ingredients:
- 1 cup unsalted butter, softened 🧈
The butter serves as the base for these cookies, providing the rich and creamy flavor that is characteristic of Snowball Cookies. Make sure to soften it at room temperature before using for the best results. - 1/2 cup powdered sugar (plus more for rolling) 🍬
Powdered sugar is key in Snowball Cookies, giving them both sweetness and a smooth, melt-in-your-mouth texture. The powdered sugar also helps create the snowy look when you coat the cookies after baking. - 1 teaspoon vanilla extract 🍨
This adds a warm, sweet aroma and a subtle flavor that complements the richness of the butter. - 2 cups all-purpose flour 🌾
All-purpose flour is the main dry ingredient that binds everything together. It provides structure to the cookies and ensures they hold their shape. - 1 cup finely chopped pecans or walnuts (optional) 🌰
Nuts add a delightful crunch and earthy flavor to the cookies. Pecans or walnuts are traditional in Snowball Cookies, but you can substitute with any nuts of your choice or skip them altogether for a nut-free version. - Pinch of salt 🧂
Salt balances out the sweetness of the powdered sugar and helps bring out the flavors in the cookie dough.
Instructions:
1️⃣ Preheat the Oven:
Begin by preheating your oven to 350°F (175°C). Prepare a baking sheet by lining it with parchment paper. This will prevent the cookies from sticking and ensure easy cleanup after baking.
2️⃣ Make the Dough:
In a large mixing bowl, beat the softened butter and powdered sugar together using a hand mixer or stand mixer on medium speed. Continue mixing until the mixture becomes light and fluffy. This process helps to incorporate air into the dough, giving the cookies a delicate texture.
Once fluffy, add in the vanilla extract and a pinch of salt. Stir until combined. Gradually add the all-purpose flour, one small portion at a time, mixing until the dough comes together. If you’re using nuts, fold them in at this point until evenly distributed throughout the dough.
3️⃣ Shape the Cookies:
Take small portions of the dough and roll them into 1-inch balls. It’s helpful to use a cookie scoop or your hands to ensure uniform sizes, which will bake evenly. Place the dough balls on the lined baking sheet, spacing them about 1 inch apart to allow for slight spreading while baking.
4️⃣ Bake:
Bake the cookies in the preheated oven for about 12-15 minutes, or until the edges are just starting to turn a light golden brown. The cookies should feel firm to the touch but will continue to set as they cool. It’s important not to overbake them to preserve their tender texture.
5️⃣ Coat with Sugar:
Allow the cookies to cool on the baking sheet for about 5 minutes before transferring them to a wire rack to cool completely. While they are still warm, roll each cookie gently in powdered sugar to coat. This gives them the “snowball” effect. For an extra snowy look, roll them again in powdered sugar once they are completely cool. This step adds to the festive, sweet appearance and ensures the sugar sticks well.
6️⃣ Enjoy:
Once the cookies are completely coated and cooled, serve them immediately or store them in an airtight container for up to a week. They pair beautifully with a cup of hot cocoa, tea, or coffee. You can also pack them in decorative tins and give them as holiday gifts!
Additional Tips and Variations:
- Consistency of Dough: If the dough seems too soft or sticky, chill it in the refrigerator for about 30 minutes before shaping. This will make it easier to roll into balls without sticking.
- Flour Substitution: You can substitute all-purpose flour with gluten-free flour if you need a gluten-free version. Just make sure to use a 1-to-1 gluten-free flour blend that’s designed for baking.
- Nuts: If you’re allergic to nuts or just don’t enjoy them, feel free to omit them from the recipe. The cookies will still have great flavor without them. You can also experiment with different types of nuts, such as hazelnuts or almonds, to add your own twist.
- Make-Ahead: These cookies are perfect for making ahead of time. You can store the cookie dough in the fridge for up to 3 days before baking or freeze the unbaked dough balls. When you’re ready to bake, just place the frozen dough on a parchment-lined baking sheet and bake for an additional 2-3 minutes.
Storage and Shelf Life:
- Storage: Snowball Cookies should be stored in an airtight container to maintain their delicate texture. They will stay fresh for up to 1 week at room temperature.
- Freezing: You can freeze these cookies for up to 2-3 months. Just be sure to wrap them well in plastic wrap or place them in an airtight freezer bag. Thaw at room temperature when ready to enjoy.
Why You’ll Love These Snowball Cookies:
- Simple Ingredients: Most of the ingredients are pantry staples, making them easy to prepare at any time.
- Melt-in-Your-Mouth Texture: The combination of butter, powdered sugar, and flour creates a soft, crumbly cookie that melts in your mouth.
- Versatile: These cookies can be made with or without nuts and can be customized with different flavorings or toppings, making them perfect for any occasion.
- Perfect for Sharing: Their cute, bite-sized shape makes them easy to share at holiday gatherings, family get-togethers, or even office parties.
These Snowball Cookies are the epitome of holiday baking—light, buttery, and full of festive charm. They are perfect for celebrating the season with family and friends or simply treating yourself to a sweet moment of indulgence. Enjoy!